01 引言
本文参考:https://blog.csdn.net/Alex_81D/article/details/123995878
本文主要记录在docker下安装oracle11g的整体流程;
02 安装
拉取 oracle 11g 镜像(有6g,要等较长的时间):
docker pull registry.cn-hangzhou.aliyuncs.com/helowin/oracle_11g
执行以下命令以创建并运行 Oracle 11g 容器(其中:30026为映射主机端口,8081为管理界面端口,helowin为Oracle数据库唯一实例ID,这些都是可以配置的):
docker run -d -p 30026:1521 -p 8081:8080 \
--name oracle_11g \
-e ORACLE_HOME=/home/oracle/app/oracle/product/11.2.0/dbhome_2 \
-e ORACLE_SID=helowin \
registry.cn-hangzhou.aliyuncs.com/helowin/oracle_11g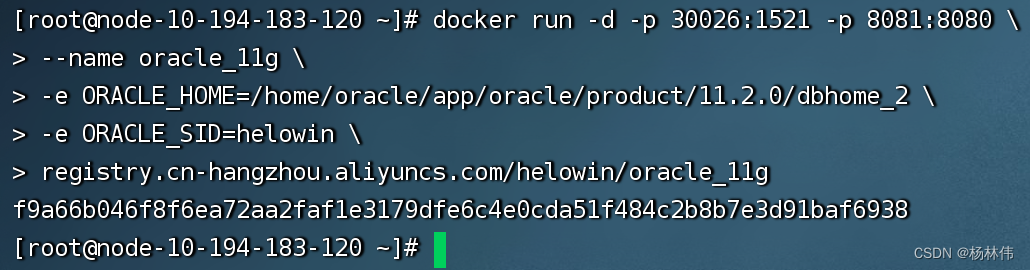
查看容器是否启动:
docker ps -a|grep oracle_11g
03 配置
进入容器:
docker exec -it oracle_11g bash依次执行:
# 1. 切换至root用户(默认是oracle用户),密码为helowin
su root

# 2. 创建软链接
ln -s $ORACLE_HOME/bin/sqlplus /usr/bin

# 3.切换回oracle用户
su oracle

# 4. 登录sql plus
sqlplus /nolog
conn /as sysdba
## 4.1 修改system用户密码为system
alter user system identified by system;
## 4.2 修改sys用户密码为system
alter user sys identified by system;
## 4.3 新增一个测试用户(用户名:test,密码:test123);
create user test identified by test123;
## 4.4 将dba权限给内部管理员账号和密码
grant connect,resource,dba to test;
## 4.5 修改密码策略规则为:密码永不过期
ALTER PROFILE DEFAULT LIMIT PASSWORD_LIFE_TIME UNLIMITED;
## 4.6 修改数据库最大连接数;
alter system set processes=1000 scope=spfile;
## 4.7 最后重启数据库;
shutdown immediate;
startup;

# 5.退出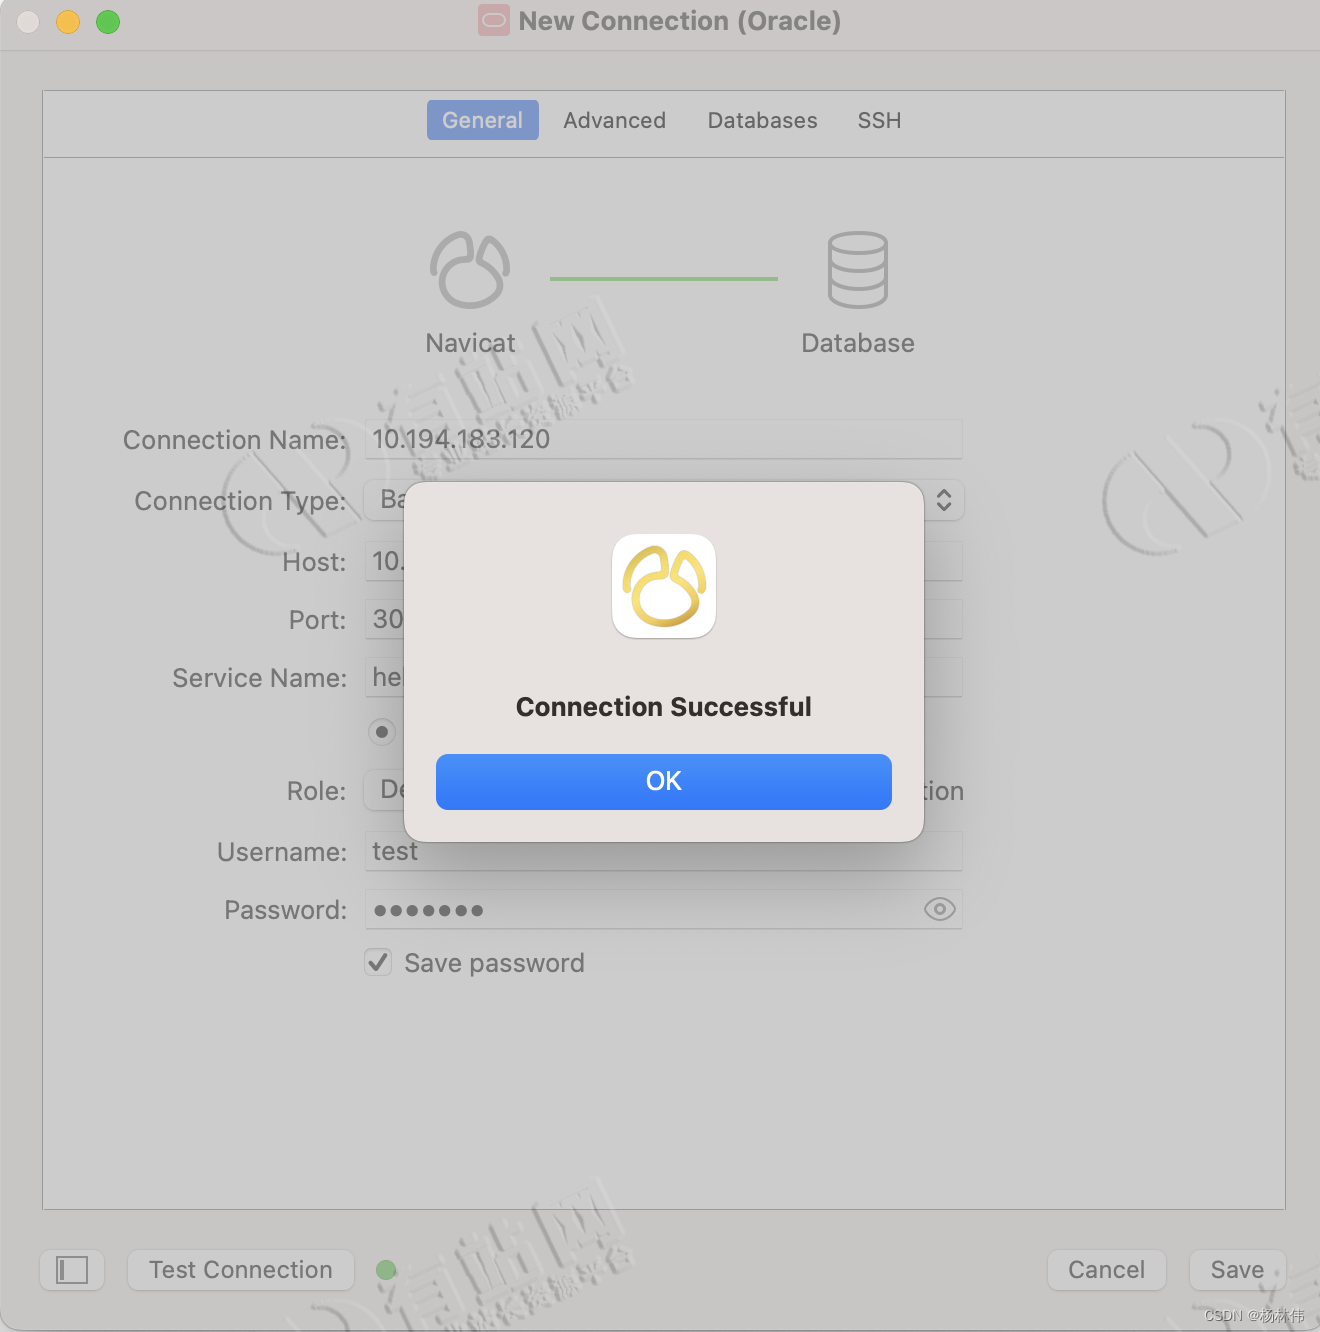
exitnavicat验证,账号密码有3个:
- system/system
- sys/system
- test/test123
04 文末
ok,本文讲解完了再docker下安装oracle11g的整体流程,希望能帮助到大家,谢谢大家的阅读,本文完!
声明:本站所有资源,如无特殊说明或标注,均为本站原创发布。任何个人或组织,在未征得本站同意时,禁止复制、盗用、采集、发布本站内容到任何网站、书籍等各类媒体平台。如若本站内容侵犯了原著者的合法权益,可联系我们进行处理。