
一、反射
Java的反射(reflection)机制是在运行状态中,对于任意一个类,都能够知道这个类的所有属性和方法;对于任
意一个对象,都能够调用它的任意方法和属性,既然能拿到那么,我们就可以修改部分类型信息;这种动态获取信
息以及动态调用对象方法的功能称为java语言的反射(reflection)机制。.png)
反射的相关类
.在日常的第三方应用开发过程中,经常会遇到某个类的某个成员变量、方法或是属性是私有的或是只对系统
应用开放,这时候就可以利用Java的反射机制通过反射来获取所需的私有成员或是方法 。
| 类名 | 用途 |
|---|---|
| Class类 | 代表类的实体,在运行的java应用程序种表示类和接口 |
| Field | 代表类的成员变量 |
| Method类 | 代表类的方法 |
| Constructor类 | 代表类的构造方法 |
反射机制的起源:
Java文件被编译后,生成了.class文件,JVM此时就要去解读.class文件 ,被编译后的Java文件.class也被JVM解析为一个对象,这个对象就是 java.lang.Class .这样当程序在运行时,每个java文件就最终变成了Class类对象的一个实例。我们通过Java的反射机制应用到这个实例,就可以去获得甚至去添加改变这个类的属性和动作,使得这个类成为一个动态的类
获得Class对象的三种方法
这里我们已获取Person为例
class Person {
    int age;
    String name;

    public Person() {

    }
    public Person(int age, String name) {
        this.age = age;
        this.name = name;
    }
}
1.使用类对象的getClass()方法
public static void main(String[] args) {
        Person person = new Person();
        Class<? > p = person.getClass();
    }
2.通过类名 .class方法
public static void main(String[] args) {
        Class<?> p1 = Person.class;
    }
3.使用 Class.forName(“类的全路径名”);
这里我们需要处理相关的异常
public static void main(String[] args) {
        Class<?> p2 = null;
        try {
             p2 = Class.forName("Person");
        } catch (ClassNotFoundException e) {
            throw new RuntimeException(e);
        }
    }
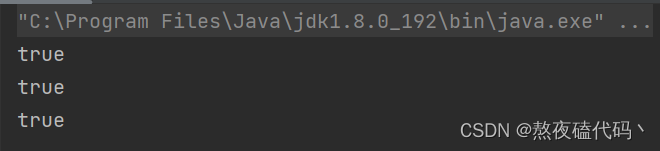
我们来验证一下这三种方式获取的类对象
public static void main(String[] args) {
        Person person = new Person();
        Class<? > p = person.getClass();
        Class<?> p1 = Person.class;
        Class<?> p2 = null;
        try {
             p2 = Class.forName("Person");
        } catch (ClassNotFoundException e) {
            throw new RuntimeException(e);
        }
        System.out.println(p.equals(p1));
        System.out.println(p.equals(p2));
        System.out.println(p1.equals(p2));
    }
反射的基本使用
获得类常用方法
| 方法 | 用途 |
|---|---|
| getClassLoader() | 获得类的加载器 |
| getDeclaredClasses() | 返回一个数组,包含类中所有类和接口的对象 |
| forName(String className) | 根据类名返回对象 |
| newInstance() | 创建类的实例 |
| getName | 获取类的完整路径名字 |
1.通过反射创建对象
public static void reflectNewInstance() {
        try {
            Class<?> personClass = Class.forName("Person");
            Person student = (Person)personClass.newInstance();
            System.out.println(student);
        } catch (ClassNotFoundException | InstantiationException | IllegalAccessException e) {
            throw new RuntimeException(e);
        }
    }

我们需要注意newInstance返回的是一个泛型,在编译阶段擦除为Object,所以我们在接受的时候需要强制类型转换
2.通过反射获取构造方法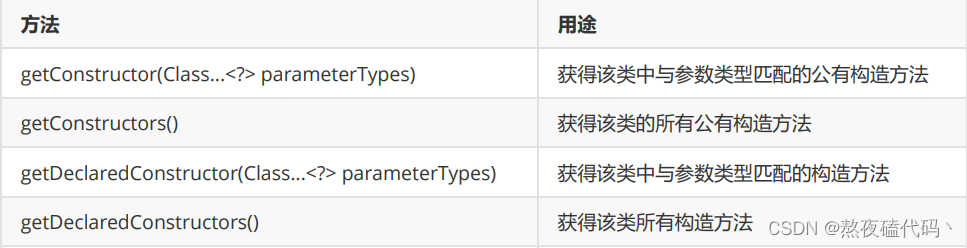
我们来获取一下私有的构造方法
public static void reflectConstructor() {
        try {
            Class<?> personClass = Class.forName("Person");
            Constructor<?> constructor = personClass.getDeclaredConstructor(int.class, String.class);
            Person person = (Person)constructor.newInstance(18, "张三");
            System.out.println(person);
        } catch (ClassNotFoundException e) {
            throw new RuntimeException(e);
        } catch (NoSuchMethodException e) {
            throw new RuntimeException(e);
        } catch (InvocationTargetException e) {
            throw new RuntimeException(e);
        } catch (InstantiationException e) {
            throw new RuntimeException(e);
        } catch (IllegalAccessException e) {
            throw new RuntimeException(e);
        }
    }

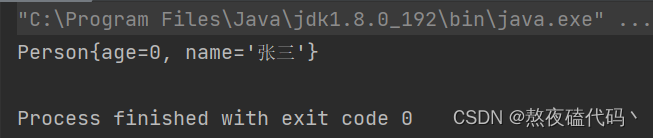
我们可以发现系统报错,无法获取私有的,那到底是怎么回事呢?因为我们需要打开一下权限。
public static void reflectConstructor() {
        try {
            Class<?> personClass = Class.forName("Person");
            Constructor<?> constructor = personClass.getDeclaredConstructor(int.class, String.class);
            constructor.setAccessible(true);//把权限打开
            Person person = (Person)constructor.newInstance(18, "张三");
            System.out.println(person);
        } catch (ClassNotFoundException e) {
            throw new RuntimeException(e);
        } catch (NoSuchMethodException e) {
            throw new RuntimeException(e);
        } catch (InvocationTargetException e) {
            throw new RuntimeException(e);
        } catch (InstantiationException e) {
            throw new RuntimeException(e);
        } catch (IllegalAccessException e) {
            throw new RuntimeException(e);
        }
    }


3.通过反射获取相关属性
| 方法 | 用途 |
|---|---|
| getField(String name) | 获得某个公有的属性对象 |
| getFields() | 获得所有公有的属性对象 |
| getDeclaredField(String name) | 获得某个属性对象 |
| getDeclaredFields() | 获得所有属性对象 |
public static void reflectField() {
        try {
            Class<?> personClass = Class.forName("Person");
            Field field = personClass.getDeclaredField("name");
            field.setAccessible(true);
            Person person = (Person)personClass.newInstance();
            field.set(person,"张三");
            System.out.println(person);
        } catch (ClassNotFoundException e) {
            throw new RuntimeException(e);
        } catch (NoSuchFieldException e) {
            throw new RuntimeException(e);
        } catch (InstantiationException e) {
            throw new RuntimeException(e);
        } catch (IllegalAccessException e) {
            throw new RuntimeException(e);
        }
    }
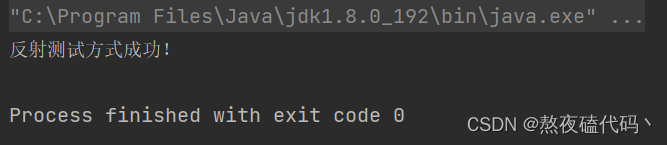
3.通过反射获取相关方法
private void print(String s) {
        System.out.println(s);
    }
这里以获取这个私有方法为例
public static void reflectMethod() {
        try {
            Class<?> personClass = Class.forName("Person");
            Method print = personClass.getDeclaredMethod("print",String.class);
            print.setAccessible(true);
            Person person = (Person)personClass.newInstance();
            print.invoke(person,"反射测试方式成功!");
        } catch (ClassNotFoundException e) {
            throw new RuntimeException(e);
        } catch (NoSuchMethodException e) {
            throw new RuntimeException(e);
        } catch (InstantiationException e) {
            throw new RuntimeException(e);
        } catch (IllegalAccessException e) {
            throw new RuntimeException(e);
        } catch (InvocationTargetException e) {
            throw new RuntimeException(e);
        }
    }
反射优点和缺点
优点:
- 对于任意一个类,都能够知道这个类的所有属性和方法;对于任意一个对象,都能够调用它的任意一个方法
- 增加程序的灵活性和扩展性,降低耦合性,提高自适应能力
- 反射已经运用在了很多流行框架如:Struts、Hibernate、Spring 等等。
缺点:
- 使用反射会有效率问题。会导致程序效率降低。
- 反射技术绕过了源代码的技术,因而会带来维护问题。反射代码比相应的直接代码更复杂 。
二、枚举
背景及定义
我们创建一个Color枚举类型
public enum ColorEnum {
    BLACK,YELLOW,GREEN;
}
优点:将常量组织起来统一进行管理
场景:错误状态码,消息类型,颜色的划分,状态机等等…
本质:是 java.lang.Enum 的子类,也就是说,自己写的枚举类,就算没有显示的继承 Enum ,但是其默认继承了这个类。
枚举的使用
1.switch语句
enum ColorEnum {
BLACK,YELLOW,GREEN;
}
public class Test {
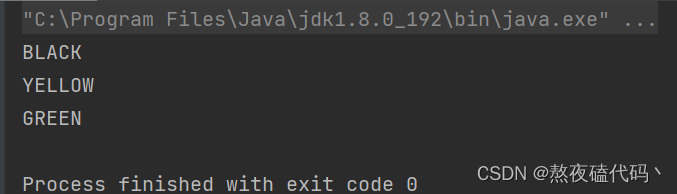
public static void main(String[] args) {
ColorEnum colorEnum = ColorEnum.YELLOW;
switch (colorEnum) {
case BLACK:
System.out.println("BLACK");
break;
case YELLOW:
System.out.println("YELLOW");
break;
case GREEN:
System.out.println("GREEN");
break;
default:
break;
}
}
}

2.常用方法
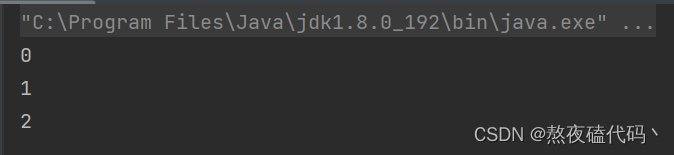
values() 以数组形式返回枚举所有成员
public static void main(String[] args) {
        ColorEnum[] colorEnums = ColorEnum.values();
        for (int i = 0; i < colorEnums.length; i++) {
            System.out.println(colorEnums[i]);
        }
    }
ordinal()获取枚举成员的索引位置
public static void main(String[] args) {
        ColorEnum[] colorEnums = ColorEnum.values();
        for (int i = 0; i < colorEnums.length; i++) {
            System.out.println(colorEnums[i].ordinal());
        }
    }
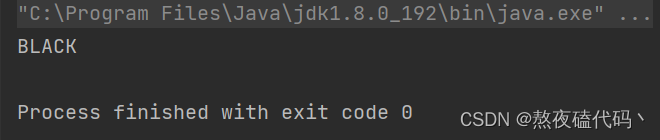
valueOf()将普通字符串转换为枚举实例
public static void main(String[] args) {
        ColorEnum colorEnum = ColorEnum.valueOf("BLACK");
        System.out.println(colorEnum);
    }
只能转换枚举类型种已经定义的
public static void main(String[] args) {
        ColorEnum colorEnum = ColorEnum.valueOf("RED");
        System.out.println(colorEnum);
    }

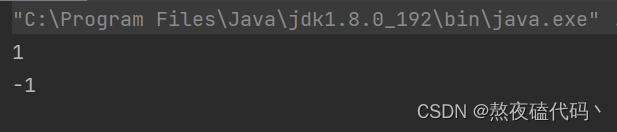
compareTo() 比较两个枚举成员在定义时的顺序
public static void main(String[] args) {
        System.out.println(ColorEnum.GREEN.compareTo(ColorEnum.YELLOW));
        System.out.println(ColorEnum.BLACK.compareTo(ColorEnum.YELLOW));
    }
为什么Enum源码中找不到values()方法?
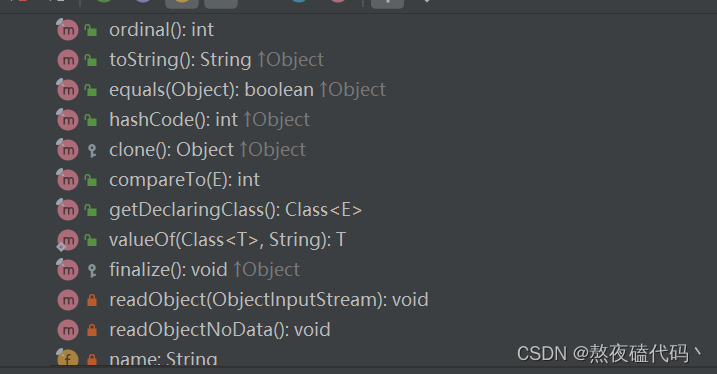
Enum类和enum关键字定义的类型都有values方法,但是点进去会发现找不到这个方法。这是因为java编译器在编译这个类(enum关键字定义的类默认继承java.lang.Enum)的时候自动插入了一条static的方法values。在官方文档中有说明。
文档地址:官方文档
枚举与反射
枚举的构造方法默认是私有的
enum ColorEnum {
    BLACK(0,"black"),YELLOW(1,"yellow"),GREEN(2,"green");
    private int id;
    private String color;

    private ColorEnum(int id, String color) {
        this.id = id;
        this.color = color;
    }
}
在枚举中调用
为什么我们通过反射调用枚举的构造方法时会报java.lang.IllegalArgumentException: 异常呢?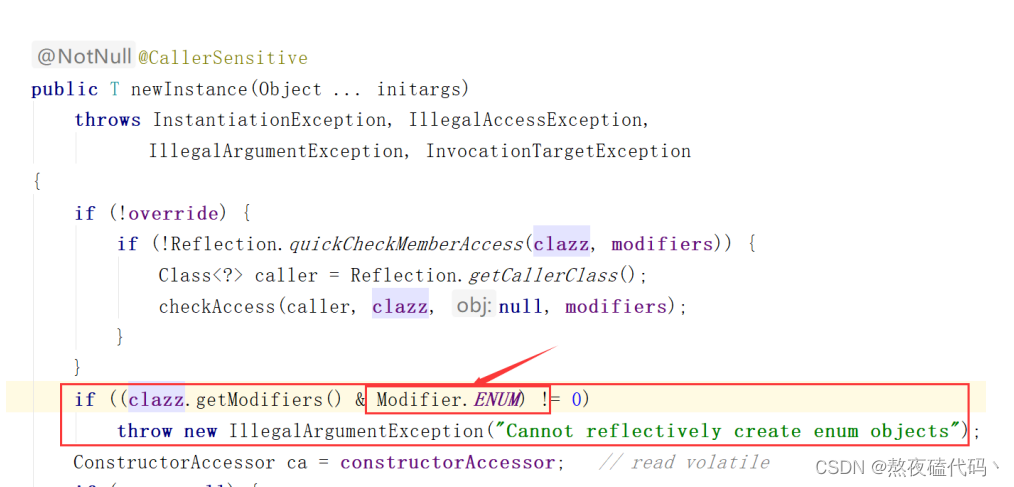
我们在源码中可以发现枚举在这里被过滤了,你不能通过反射获取枚举类的实例。
这里证明: 枚举实现单例模式是安全的
总结
1、枚举本身就是一个类,其构造方法默认为私有的,且都是默认继承与 java.lang.Enum
2、枚举可以避免反射和序列化问题
3、枚举实现单例模式是安全的
优点:
- 枚举常量更简单安全 。
- 枚举具有内置方法 ,代码更优雅
缺点:
- 不可继承,无法扩展
三、Lambda表达式
Lambda表达式是Java SE 8中一个重要的新特性。lambda表达式允许你通过表达式来代替功能接口。 lambda表达式就和方法一样,它提供了一个正常的参数列表和一个使用这些参数的主体(body,可以是一个表达式或一个代码块)。 Lambda 表达式(Lambda expression),基于数学中的λ演算得名,也可称为闭包(Closure) 。
先了解一下什么是函数式接口?
函数式接口
要了解Lambda表达式,首先需要了解什么是函数式接口,函数式接口定义:一个接口有且只有一个抽象方法 。
注意:
- 如果一个接口只有一个抽象方法,那么该接口就是一个函数式接口
- 如果我们在某个接口上声明了 @FunctionalInterface 注解,那么编译器就会按照函数式接口的定义来要求该接
口,这样如果有两个抽象方法,程序编译就会报错的。所以,从某种意义上来说,只要你保证你的接口中只
有一个抽象方法,你可以不加这个注解。加上就会自动进行检测的。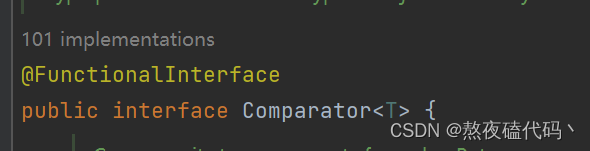
我们以优先级队列为例,传入的比较器,我们可以发现这个接口上面有@FunctionalInterface关键字,证明它就是一个函数式接口,我们在传入参数的时候就可以使用lambda表达式。
Lambda表达式的基本使用
- 参数类型可以省略,如果需要省略,每个参数的类型都要省略。
- 参数的小括号里面只有一个参数,那么小括号可以省略
- 如果方法体当中只有一句代码,那么大括号可以省略
- 如果方法体中只有一条语句,其是return语句,那么大括号可以省略,且去掉return关键字
在这里我们自定义几个函数式接口。
1.无参数无返回值
@FunctionalInterface
interface LambdaTest {
void func();
}
public static void main(String[] args) {
LambdaTest lambda = new LambdaTest() {
@Override
public void func() {
System.out.println("lambda测试");
}
};
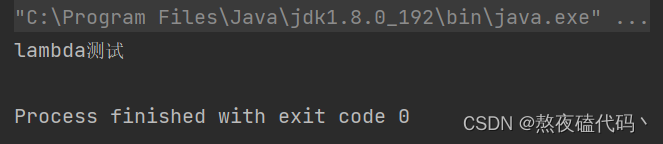
lambda.func();
}
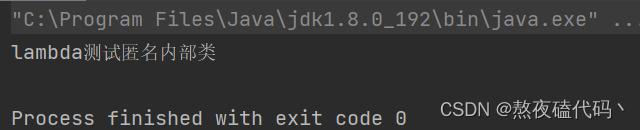
这里我们使用匿名内部类
public static void main(String[] args) {
        LambdaTest lambdaTest = (() -> System.out.println("lambda测试"));
        lambdaTest.func();
    }
2.有参数无返回值
@FunctionalInterface
interface LambdaTest {
    void func(String s);
}
    public static void main(String[] args) {
        LambdaTest lambda = new LambdaTest() {
            @Override
            public void func(String s) {
                System.out.println("lambda测试" + s);
            }
        };
       lambda.func("匿名内部类");
    }
public static void main(String[] args) {
        LambdaTest lambda = s -> System.out.println("lambda测试" + s);
        lambda.func("lambda测试");
    }

参数只有一个时,可以去掉括号。
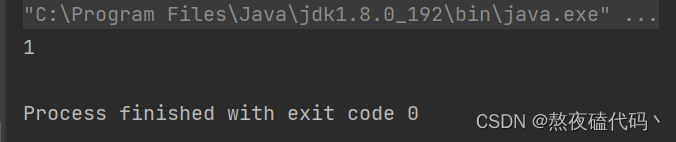
3.没有参数有返回值
@FunctionalInterface
interface LambdaTest {
    int func();
}
    public static void main(String[] args) {
        LambdaTest lambdaTest = new LambdaTest() {
            @Override
            public int func() {
                return 1;
            }
        };
        System.out.println(lambdaTest.func());
    }

interface LambdaTest {
    int func();
}
public class Test {
    public static void main(String[] args) {
        LambdaTest lambdaTest = () -> 1;
        System.out.println(lambdaTest.func());
    }
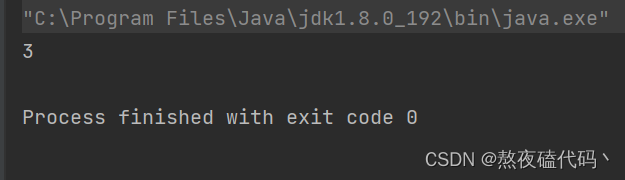
4.有参数有返回值
@FunctionalInterface
interface LambdaTest {
    int func(int a,int b);
}
    public static void main(String[] args) {
        LambdaTest lambdaTest = new LambdaTest() {
            @Override
            public int func(int a, int b) {
                return a + b;
            }
        };
        System.out.println(lambdaTest.func(1, 2));
    }
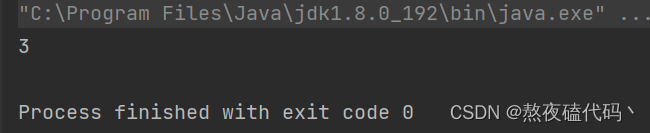
public static void main(String[] args) {
        LambdaTest lambdaTest = (a,b) -> a+b;
        System.out.println(lambdaTest.func(1, 2));
    }
lambda在集合中的应用
1.forEach() 方法演示
我们来看一下forEach的参数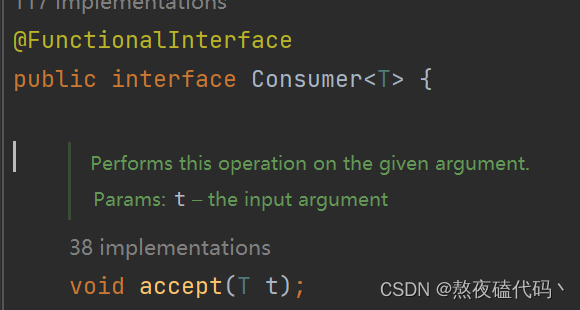
我们发现是一个函数式接口,所以我们可以使用lambda表达式
public static void main(String[] args) {
        Set<Integer> set = new HashSet<>();
        set.add(1);
        set.add(2);
        set.add(3);
        set.add(4);
        set.forEach(new Consumer<Integer>() {
            @Override
            public void accept(Integer integer) {
                System.out.print(integer + " ");
            }
        });
    }
lambda表达式:
public static void main(String[] args) {
        Set<Integer> set = new HashSet<>();
        set.add(1);
        set.add(2);
        set.add(3);
        set.add(4);
        set.forEach(integer -> System.out.print(integer + " "));
    }

2.HashMap 的 forEach()
匿名内部类:
public static void main(String[] args) {
        HashMap<String,Integer> hashMap = new HashMap<>();
        hashMap.put("aaa",1);
        hashMap.put("bbb",2);
        hashMap.put("ccc",3);
        hashMap.forEach(new BiConsumer<String, Integer>() {
            @Override
            public void accept(String s, Integer integer) {
                System.out.println(s + " -> " + integer );
            }
        });
    }
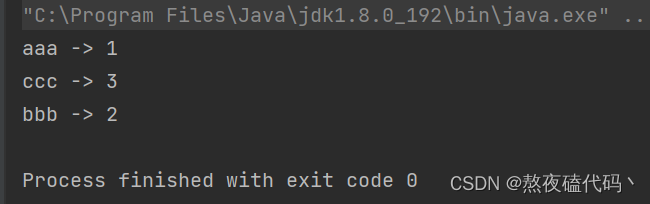
lambda表达式:
public static void main(String[] args) {
        HashMap<String,Integer> hashMap = new HashMap<>();
        hashMap.put("aaa",1);
        hashMap.put("bbb",2);
        hashMap.put("ccc",3);
        hashMap.forEach((String s,Integer i) -> System.out.println(s + " -> " + i ));
    }
3.sort() 方法演示
我们发现这里是一个函数式接口
public static void main(String[] args) {
        ArrayList<Integer> arrayList = new ArrayList<>();
        arrayList.add(3);
        arrayList.add(1);
        arrayList.add(2);
        arrayList.sort(new Comparator<Integer>() {
            @Override
            public int compare(Integer o1, Integer o2) {
                return o1 - o2;
            }
        });
    }
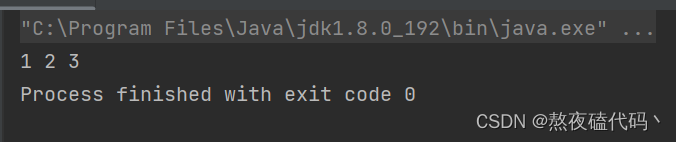
lambda表达式:
public static void main(String[] args) {
        ArrayList<Integer> arrayList = new ArrayList<>();
        arrayList.add(3);
        arrayList.add(1);
        arrayList.add(2);
        arrayList.sort((o1,o2) -> o1 - o2);
        for (Integer integer : arrayList) {
            System.out.print(integer + " ");
        }
    }
总结
Lambda表达式的优点很明显,在代码层次上来说,使代码变得非常的简洁。缺点也很明显,代码不易读。
优点:
- 代码简洁,开发迅速
- 方便函数式编程
- 非常容易进行并行计算
- Java 引入 Lambda,改善了集合操作
缺点:
- 代码可读性变差
- 在非并行计算中,很多计算未必有传统的 for 性能要高
- 不容易进行调试